

Taking Body Measurements for Pattern Making
Learn how to take accurate body measurements for sewing and pattern making. This guide explains where and how to measure each part of the body, with clear illustrations and a printable measurement chart to help you record your measurements.
Taking Body Measurements
Having a complete and accurately measured list of body measurements is an essential part of patternmaking. Accurate measurements allow us to draft patterns correctly and achieve a better fit in our garments, minimizing the need for adjustments.
In this lesson, I will show you how to take accurate body measurements before we begin drafting our basic patterns.
What You’ll Need:
- Measuring tape
- Notebook (paper or digital)
- A piece of ribbon long enough to wrap around the waist
Preparation:
Follow these instructions to prepare before taking your measurements:
- Stand upright with your body relaxed, without sucking in or pushing out your stomach.
- Keep your feet together or slightly apart.
- Wear close-fitting clothing, preferably made from stretch fabric, such as leggings and a fitted top.
- Be careful not to pull the measuring tape too tightly or leave it too loose.
Mark the Natural Waist
Place the ribbon around the waist and secure it with a safety pin or tie it so it stays in place. It should not be too tight or too loose. We will use this ribbon as if it were a line drawn around the waist, and use it as a reference when taking the measurements.
This is important because several measurements depend on having a consistent waistline reference, such as front waist length, back waist length, waist-to-ankle length, and others.
Taking the Measurements
I will be using my own measurement list. If you would like to use it, it is free to download and you can either print it or fill it out digitally:
In the file you will find a graphic that shows you how to place the measuring tape for each measurement and the list of measurements to fill in 👇
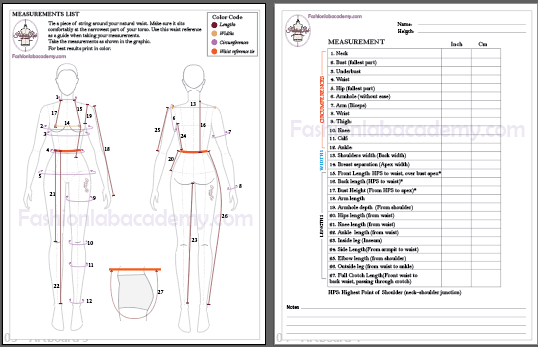
The list is divided into the following categories:
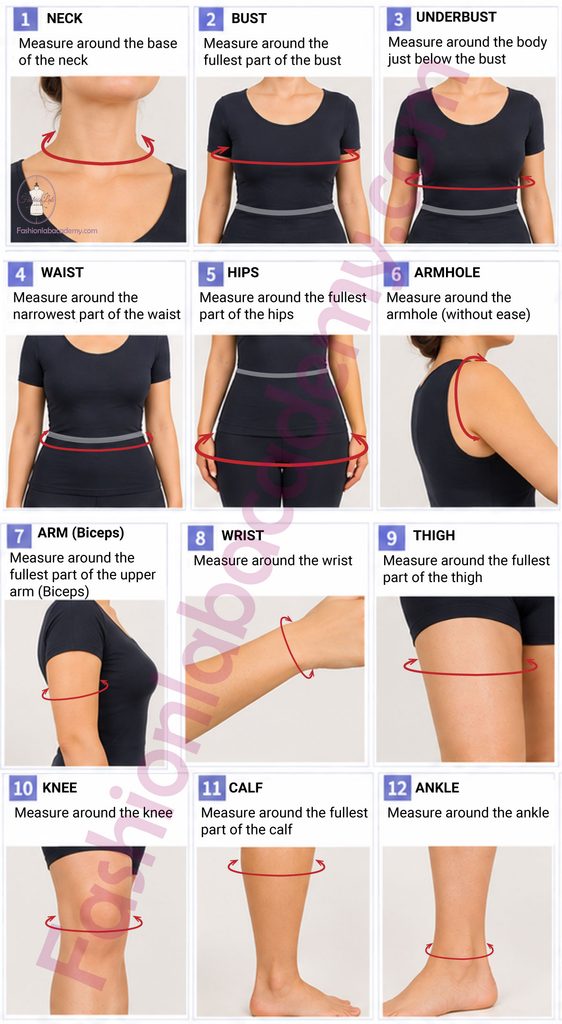
Circumferences: These measurements are taken by wrapping the measuring tape around specific areas of the body, such as the waist and hips, to determine their full circumference.
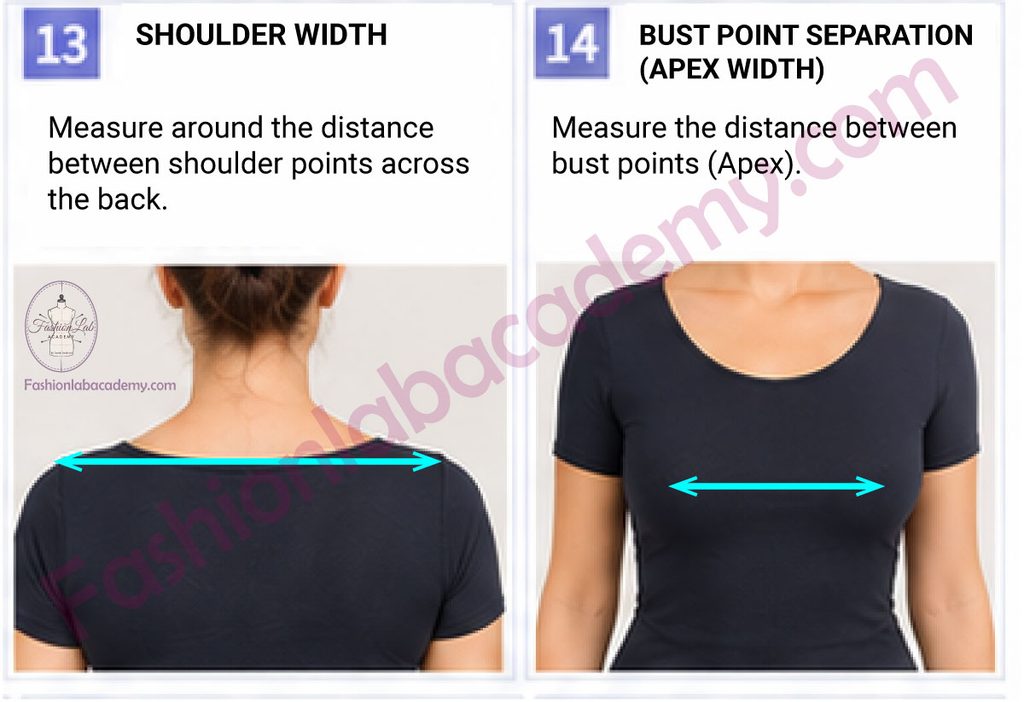
Widths: These are horizontal measurements that indicate the distance from one point of the body to another.
Lengths: These are vertical measurements used to determine the distance from one point of the body to another.
CIRCUMFERENCES
WIDTHS
LENGTHS
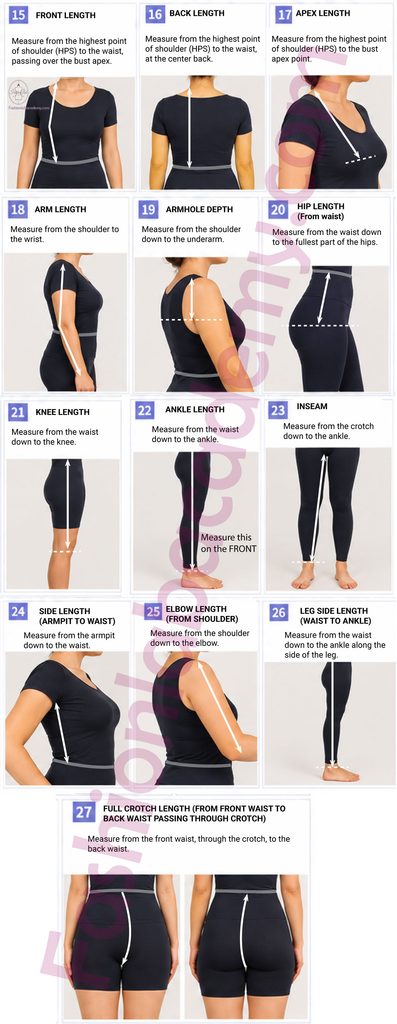
You can use the images above as a guide when taking your measurements. If you would like to see the measuring process in more detail, here is a video where I show you how to take measurements of another person, as well as how to take your own body measurements.
Tips
- Take each measurement twice to confirm the result.
- If necessary, you can round your measurements, but never by more than ¼ inch or 5 mm.
- Record each measurement as soon as you confirm it.
- Use a measuring tape with both centimeters and inches, and record your measurements in both units. This is useful if you want to work with different patternmaking guides or methods
Previous Class
Upcoming Classes
In the upcoming classes, I will teach you how to create your basic pattern sets using both standard sizes and individual measurements.
Standard Sizes
- Basic Bodice Pattern
- Basic Sleeve Pattern
- Basic Skirt Pattern
- Basic Pants Pattern
Individual Measurements
- Basic Bodice Pattern
- Basic Sleeve Pattern
- Basic Skirt Pattern
- Basic Pants Pattern